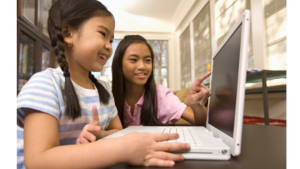
Ever wonder how to introduce computing without a lot of screen time? We’ve got the answer! Read about Ada Lovelace, the first computer programmer, code a “robot” to make a peanut butter and jelly sandwich, and transform your name into binary code. It’s all below in this coding lesson plan!
Resources in This Lesson
Resource 1
Nominate someone to “become” a robot in this hilarious group activity that emphasizes the need for specificity in coding!
Rosie Explores Coding
https://handsonstem.rosieriveters.com/resources/rosie-explores-coding/
Resource 2
For our book, we’re reading Who Says Women Can’t be Computer Programmers?, which explores the life of Ada Lovelace, the world’s first computer programmer.
Rosie Reads Who Says Women Can’t Be Computer Programmers?
https://handsonstem.rosieriveters.com/resources/rosie-reads-who-says-women-cant-be-computer-programmers/
Resource 3
Learn how to code without any screen time in this hands-on activity that translates your name – or any word – into binary code jewelry!
Rosie Makes Binary Jewelry
https://handsonstem.rosieriveters.com/resources/rosie-makes-binary-jewelry/
Resource 4
Continue learning and exploring with some of these tried and tested Rosie Recommends activities from other STEM educational resources.
Rosie Recommends Coding Activities!
https://handsonstem.rosieriveters.com/resources/rosie-recommends-coding-activities/
- If peanut allergies are a concern, particularly in classroom settings, substitute sunflower butter.
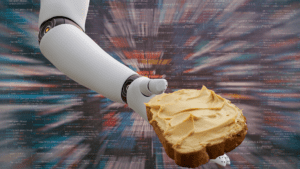
This messy but always fun Rosie Explores activity introduces kids to algorithms, functions, loops, bugs and the need for specificity in coding as they attempt to “code” a robot!
It’s best to do this with at least three people – a programmer, a robot, and a scribe to record the algorithm (the steps needed to complete the peanut butter and jelly sandwich). That way you can look back at each line of code and see where there may be “bugs” or errors in your instructions. You can also discover how you might create functions and loops to repeat steps that need to happen over and over again! This activity works great in larger classrooms too as you can designate groups of students to be scribes and programmers.
As this is an introductory coding activity, it includes some computing terms that might be new to kids:
Algorithm – a process or set of rules to be followed in calculations or other problem-solving operations, especially by a computer.
Function – a block of organized, reusable code that is used to perform a single, related action.
Loop – a control flow statement for specifying iteration, which allows code to be executed repeatedly.
Bug – an error, flaw or fault in a computer program or system that causes it to produce an incorrect or unexpected result, or to behave in unintended ways.
Ready to become a robot and make a PB&J? Watch the video for an overview, gather the materials listed at the right, and follow the instructions below!
Watch The Video
https://youtu.be/v5ZU6wuD1PE
Required Materials
- peanut butter
- jelly
- loaf of bread
- knife
- plate
- paper
- pen, pencil, or other writing tools
Step-By-Step Instructions
Step 1
Designate who will be the robot, programmer(s), and scribe(s).
Step 2
Don’t prepare for the activity! Leave the bread in the package, and the lids on the containers of the peanut butter and jelly. Place these items along with a plate and knife in front of the robot.
Step 3
Have the robot transform! Make sure the programmer and scribe know that the robot has no prior knowledge related to sandwich making. It recognizes the materials, but will only do exactly what the programmers tell it to do!
Step 4
Ask the programmer for the first step. Make sure that the robot follows these instructions literally, and watch as hilarity ensues! The scribe should be writing the steps as well, recording exactly what the programmer says.
Step 5
Continue giving the robot instructions and writing the steps until it has produced some semblance of a sandwich. Then have the robot transform back into a human, and discuss why it was so hard to get the sandwich made.
Step 6
Finalize the best version of the sandwich-making code with the scribe, and figure out which steps could be repeated using functions and loops.
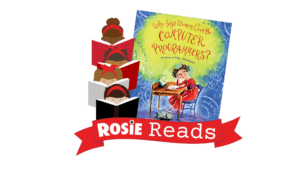
Ada Lovelace is recognized as the first computer programmer and we couldn’t be more excited to share her story! Tanya Lee Stone’s Who Says Women Can’t Be Computer Programmers?: The Story of Ada Lovelace, was whimsically illustrated by Majorie Priceman and published in 2018. The book chronicles Ada’s life and her unique ability to unite math and imagination, which ultimately led her to see the possibilities of computing well before others did. Born in London in 1815, she wrote the world’s first computer program – in the notes to an academic paper by another author no less! – in 1842-43.
When you’re finished reading Who Says Women Can’t Be Computer Programmers?, ask kids these comprehension questions:
- Why did Ada’s mother encourage her early education in math?
- What did Ada design and dream up using her imagination?
For our Rosie Reads activity, ask kids to think about how they’d like to unite math and imagination. Would they come up with a a new way to do math (or a new kind of math)? Would they invent and design things like Ada did? Encourage them to get creative, and document their ideas – they could write about it, draw it, design a presentation for it – the possibilities are endless!
Watch The Video
https://youtu.be/iueq2p9CK7U
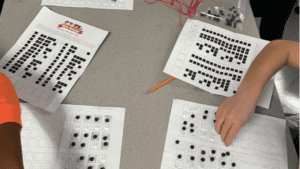
Dive into coding without using a computer – yes, you read that right! This project explores how computers use binary code to perform the tasks humans “tell” them to do, and enables kids to translate their names into binary. Once they’ve got their code, they’ll use it to make awesome binary jewelry!

To complete the project, you’ll need the two binary jewelry printables below:
And the best part – you can use these over and over again to continue the coding fun!
Ready to make this project at home or in your classroom? Watch the video for an overview, gather the materials listed at the right, and follow the instructions below!
Watch The Video
https://youtu.be/_MdC9fNzO0U
Required Materials
- 70 (two different colors, approximately 35 of each) beads
- string
- 2 printables
- marker
- scissors
Step-By-Step Instructions
Step 1
Write your name vertically along the left hand side of the 8-bit worksheet printable. Align each letter with a numbered line.
Step 2
Use the binary decoder key printable to identify the binary sequence for each letter in your name and record the code on the 8-bit worksheet.
Step 3
Place the corresponding beads onto the coded 8-bit worksheet.
Step 4
String the beads from left to right for each letter onto the string.
Step 5
Tie off the string to your desired length. Strings with longer names make great necklaces, and shorter ones are great bracelets!
Items Available to Purchase
-
Rosie Riveters Binary Wearable Kit
$10
https://www.rosieriveters.com/shop#!/Binary-Wearable/p/212364106/category=53198723

Check out some of these tried and tested coding activities from other STEM education resources!
Recommended Resources
Resource 1
Turn kids into robots in this super fun activity where you’ll determine commands and draw a grid as a “developer” navigates their “bot” to a ball. Be sure to take some time to poke around on the CSunplugged @home site while you’re there; they’ve got all kinds of other great ideas for learning about computer science without the screen!
Resource 2
Hour of Code was started as a one-hour introduction to computer science, and it has since grown to be a huge part of Computer Science Education Week (typically around the first full week of December). The website’s activities section definitely has something for everyone! We love code.org‘s Dance Party for grades two and up and you can code your own meditation app too! This doesn’t even begin to scratch the surface of what’s available, and if you’re short on time, no problem! As the title suggests, most of the activities take less than an hour.
Resource 3
Got an aspiring app developer on your hands? Be sure to check out the MIT App Inventor, where you’ll get to build a Magic 8-ball app! This one is ideal for older kids with some coding experience, and the MIT App Inventor itself is just a really cool tool. There are tons of tutorials and, once you’re feeling confident, you can use the create apps! feature (top left) to code apps of your own!