Pre-Built Lesson: Chemical Reactions
From digestion to photosynthesis, cooking to washing the dishes, chemical reactions make the world go round. You experience hundreds of thousands of them while you go about your day, and and we’re so excited to share these fun ways to play and learn from chemical change!
Resources in This Lesson
Resource 1
We did four – yes that’s right, four! – demonstrations and experiments in this super fun video that covers the differences between physical and chemical change, and delves even further into the science of chemical reactions!
Rosie Explores Chemical and Physical Change
https://handsonstem.rosieriveters.com/resources/rosie-explores-chemical-and-physical-change/
Resource 2
This episode of Rosie Reads features special guest reader Veronica, who helps read Marie Curie, a kid-friendly biography about the chemist and physicist that many regard as the first lady of STEM!
Rosie Reads Marie Curie
https://handsonstem.rosieriveters.com/resources/rosie-reads-marie-curie/
Resource 3
Two fun facts: you can make your own bath bombs with a few simple ingredients and they’re an excellent way to learn about chemical reactions! Watch this fun Rosie Makes video to see how.
Rosie Makes Bath Bombs
https://handsonstem.rosieriveters.com/resources/rosie-makes-bath-bombs/
Resource 4
Continue learning and exploring with some of these tried and tested Rosie Recommends activities from other STEM educational resources
Rosie Recommends Chemistry Activities!
https://handsonstem.rosieriveters.com/resources/rosie-recommends-chemistry-activities/
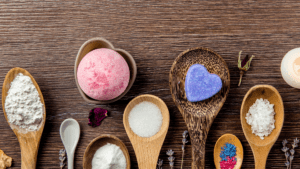
Did you know that bath bombs – the super popular bathtime toy – work because of a chemical reaction? We’re mixing some kitchen staples together that will create an explosion of colorful carbon dioxide (CO2) bubbles when the bath bomb hits the water!
Ready to make this project at home or in your classroom? Watch the video for an overview, gather the materials listed at the right, and follow the instructions below!
Watch The Video
https://youtu.be/FGTXbvHBnjk
Required Materials
- 1 cup baking soda
- 1/2 cup citric acid
- 1/2 cup corn starch
- baby oil (any skin safe oil will work)
- food coloring
- bath bomb mold (cupcake tin, plastic egg, etc.)
Step-By-Step Instructions
Step 1
Combine baking soda, citric acid and cornstarch together in a bowl and mix well.
Step 2
Add food coloring as desired.
Step 3
Add one teaspoon of baby oil, just enough to moisten the mixture so that the powder sticks together. Keep adding the oil until the mixture holds its shape when pinched (it will still look powdery).
Step 4
Pre-prep the mold with baby oil and corn starch. Place a very small amount of oil into the mold and dust the corn starch over it – similar to preparing a pan for baking.
Step 5
Scoop the mixture into a mold to form a shape. Let the shapes dry overnight.
Step 6
After 24 hours have passed, the bath bomb is ready to use! Watch the chemical reaction occur when the bath bomb mixture made of corn starch, citric acid, and baking soda combines with water to create some thing new – carbon dioxide gas, aka the bubbles!
Check out these tried and tested chemistry activities from other STEM educational resources!
Recommended Resources
Resource 1
What kid can resist bouncy balls? Make them even more amazing by creating them at home using a chemical reaction! This Kiwi Co project is as simple as it is fun, and most of the materials are common household items. The only one that might be hard to get ahold of is Borax, a household cleaner that is typically available online at Target and Amazon.
Resource 2
Explore the chemistry of food by making cheese curds! We couldn’t resist an experiment that you could eat, and this one works for all ages as it perfectly encapsulates “putting two things together to create something new” – our chemical reaction tagline from Rosie Explores! Be sure to remind your kids that virtually all cooking and baking involves chemical reactions, and prepare yourself for a whole army of scientific sous chefs!
Resource 3
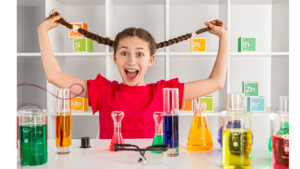
The periodic table, which records all the chemical elements, might seem daunting, but these games make it fun – we promise! Make a version of the all-time favorite Battleship with the periodic table (even younger ones can participate), play Element Hangman, or do a family game night with Periodic Table Bingo! We had a ton of fun playing these games, and know you will too!
Resource 4
Chemists use the pH scale to measure the strength of acids (substances that donate hydrogen ions) and bases (substances that accept hydrogen ions), and this food-based project uses cabbage juice to test various household substances like lemon juice and baking soda. Best for older kids, make sure you encourage them to hypothesize whether each substance is an acid or base before checking the pH printable, which is included!
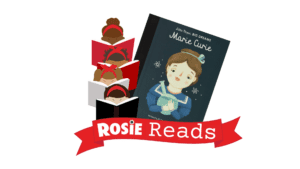
The first woman to win a Nobel Prize. The first woman to earn a PhD in physics in France. The first person ever to be awarded two Nobel Prizes. In this episode of Rosie Reads, we’re learning all about Marie Curie (1867-1934) with special guest Veronica! This kid-friendly biography, written by Marie Isabel Sanchez Vegara, illustrated by Frau Isa, and published in 2016 – is a great introduction to Curie’s life and long list of discoveries and achievements, many of which continue to help people today.
When you’re finished reading Marie Curie, ask kids these comprehension questions:
- Why did Marie move to France?
- What did she and her husband Pierre discover in their lab?
- What medical device did those discoveries help invent?
For our Rosie Reads activity, discuss how it’s never too early to start thinking about ways to help your community, and the world, just like Marie Curie, whose research “continues to help people with illnesses today”. Start by asking kids how they could use science to make the world a better place. Take it further, and ask them to invent a “new” Nobel Prize for something that has a positive impact on the world (the six existing prizes are awarded in the fields of physics, chemistry, medicine or physiology, peace, literature, and economics). For example, Veronica designed one for activism in the video! Go all out and make your medal and decide who the first recipient should be!
Watch The Video
https://youtu.be/8Jf7Mp_FwJM
Rosie Explores Chemical and Physical Change
- Fire is used as a part of these experiments. Please do not perform without an adult.
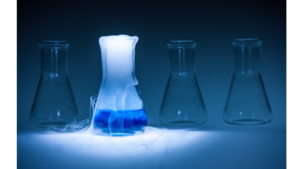
Learn the differences between chemical and physical change in this series of experiments. We’re playing with paper towels, blowing up balloons, and making all kinds of chemical reactions!
Watch The Video
https://youtu.be/7T9Edwh3dyE
Required Materials
- paper towel
- matches or lighter
- lemon (cut in half)
- glass cup
- baking soda
- food coloring
- popsicle stick
- Alka Seltzer tablet
- flask (or bottle)
- water
- 1 balloon
Step-By-Step Instructions
Step 1
Physical Change: In a physical change there can be a difference in the appearance, smell, or simple display of a sample of matter without a change in composition. To explore physical change, crumple up a piece of paper towel and observe that although the paper towel looks different, it is still a paper towel. We can reform it back into its previous state/shape and lay it flat.
Step 2
Chemical Change: In a chemical change a new substance is formed and energy is either given off or absorbed. To explore chemical change, we performed a number of experiments. First, with an adult present, crumple the paper towel back into a ball and use a lighter or match to light it on fire. Quickly drop it into a glass. Note what happens when the oxygen going into the fire is stopped by the glass. Is there a smell? Do you see smoke? After making your observations, be sure to put the fire completely out by pouring water into the glass. Use our fun hand trick from the video to remember that when chemical changes/reactions occur, you’ve mixed two things together to make something new! Another important thing to remember – you cannot reverse a chemical change, whereas you can reverse a physical change.
Step 3
We continued to explore chemical reactions with another experiment! Put half a lemon into a cup, so that the rind is facing downwards, and put a spoonful of baking soda on top of the lemon. Add a few drops of food coloring on top of the lemon and baking soda. Take a popsicle stick and push the baking soda down into the lemon. Note what happens when the citric acid from the lemon and baking soda mix and a chemical reaction takes place!
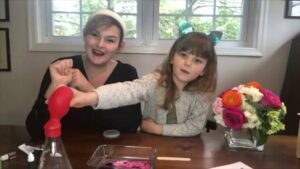
Step 4
For our last experiment, we used a chemical reaction to blow up a balloon! Break up an Alka Seltzer tablet and put the pieces inside a balloon. Fill up your flask or bottle about halfway with water. Then stretch the balloon with the Alka Seltzer pieces over the opening of the bottle (you’ll probably need to hold the Alka Seltzer pieces in the bottom of the balloon as you do this. It helps to have two sets of hands!). Drop the Alka Seltzer pieces from the balloon into the water. Shake up the bottle and note what happens to the balloon!