Pre-Built Lesson: The Science of Bubbles
Bubbles are so much fun, but they’re also a great way to dive into a range of scientific concepts. Read on below for activities that investigate the science of bubbles – from exploring how bubbles are formed to designing the best bubble wand using the scientific method – and so much more!
Resources in This Lesson
Resource 1
Investigate how bubbles form and the role surface tension plays in this bubble-filled video!
Rosie Explores Bubble Science
https://handsonstem.rosieriveters.com/resources/rosie-explores-bubble-science/
Resource 2
While The Most Magnificent Thing – a story about a girl, her dog, and their STEM journey to make the most magnificent thing – isn’t about bubbles, it does have a lot to say about perseverance. This definitely applies to kids embarking on projects involving the scientific method, which we used to design bubble wands in the Rosie Makes episode below!
Rosie Reads The Most Magnificent Thing
https://handsonstem.rosieriveters.com/resources/rosie-reads-the-most-magnificent-thing/
Resource 3
Join us for an episode of Rosie Makes, our STEM-project video series, as we use the scientific method to make some hypotheses, record data, and compare and contrast results – all in the name of designing the very best bubble wand!
Rosie Makes Bubble Wands
https://handsonstem.rosieriveters.com/resources/rosie-makes-bubble-wands/
Resource 4
Continue learning and exploring with some of these tried and tested Rosie Recommends activities from other STEM educational resources.
Rosie Recommends Bubble Activities!
https://handsonstem.rosieriveters.com/resources/rosie-recommends-bubble-activities/
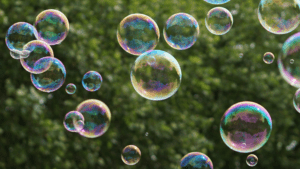
Is there anything more fun to play with on a warm day than bubbles? Join us as we explore the bubble science by investigating surface tension.
Want to duplicate this experiment at home or in your classroom? Watch the video for an overview, gather the materials listed at the right, and follow the instructions below!
Watch The Video
https://youtu.be/IsNDlDBmsmg
Required Materials
- dish soap
- water
- 2 straws
- 2 cups
- pipette
- quarter
Step-By-Step Instructions
Step 1
Fill one cup with water and then fill another cup with a mixture of soap and water.
Step 2
Use one straw to blow air into the cup filled with water. Do not drink from the straw. Note how long the bubbles last in the cup before they disappear! They are able to form due to surface tension – the attraction of the water molecules to each other.
Step 3
To illustrate this further, use the pipette to drop some of the plain water onto the surface of the quarter. Note how a dome-like shape starts to form on top of the quarter. Just like the bubbles in the cup of water, this is due to surface tension!
Step 4
Now, blow air through the straw again, but this time into the cup filled with soapy water. Remember not to drink from the straw. Note how long the bubbles last in the cup before they disappear! Longer-lasting bubbles are possible as the addition of soap to the water decreases surface tension, allowing the attraction between the water molecules to stretch and hold air longer than the bubbles formed without soap!
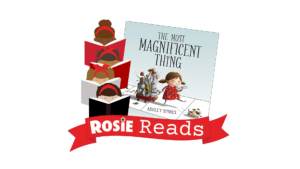
In this episode, Rosie Reads The Most Magnificent Thing, a book written and illustrated by Ashley Spires in 2014!
The story begins when a “regular girl” decides to make “the most magnificent thing.” But no matter how hard she tries, and how hard her assistant – her dog! – assists, it just isn’t right. All of us can relate to the pitfalls she encounters on her journey to make the most magnificent thing.
When you’re finished reading The Most Magnificent Thing, ask kids these comprehension questions:
- How many “tries” (count them!) does it take the book’s heroine to make her “magnificent thing,” and
- Are there clues in each version of her magnificent thing that hint at what it might be (it’s revealed at the end)? Were you able to guess what it was before that?
For our Rosie Reads activity, ask kids to think about a time when they had an idea that was really difficult to get right and how many tries it took to get there. Once they’ve thought about this experience, ask them to share it with two people – friends, relatives, teachers, you name it! And once they’ve shared their story, they should ask the person they’re sharing with about a time when they’ve had a similar experience. Overall, this is a great book for talking about problem solving and failure. By sharing stories about challenges and how we’ve overcome them, we’re reframing our relationship to failure. Because when things don’t go exactly according to plan, is that a failure? Or an opportunity?
Watch The Video
https://youtu.be/-Ylxiea5_4M
Check out these tried and tested bubble activities from other STEM educational resources!
Recommended Resources
Resource 1
Bubble in a Bubble in a Bubble
In Rosie Explores the Science of Bubbles, we demonstrated how to use a pipette to make a dome bubble on a quarter. Take that concept to the next level and give this awesome experiment a try! You’ll make some super-powered bubble solution using water, dish soap, and sugar in order to blow bubbles into bubbles until you have an enormous multi-layered creation!
Resource 2
Bubbles on the Brain: a Circle or a Square?
Think bubbles can only be round? Or maybe you just want to keep building and experimenting with different kinds of bubble wands? Either way, check out this Steve Spangler Science experiment that explores how to make a square bubble using only scissors, pipe cleaners, and straws! The concept of surface tension plays a big role here too, so make sure you’re thinking about it as you build and create!
Resource 3
If you’ve got dry ice on hand from grocery deliveries, put it to good use with these bubble-tastic subzero science experiments! Kids will learn how dry ice works while you make some pretty amazing things ranging from a crystal ball bubble to bubbles that smoke! For most of these, all you’ll need in addition to the dry ice is water, soap, and various containers. Did we mention these also make for some pretty amazing STEM-inspired Halloween tricks?
We love bubbles (who doesn’t?!) and have noticed that there are so many different kinds of bubble wands! Ones with small openings, multiple openings, square openings – you name it, they exist. We’re using the scientific method to test different materials, shapes, and sizes when we build our own bubble wands, all in an effort to make the biggest and longest-lasting bubbles possible!
Ready to make this project at home or in your classroom? Watch the video for an overview, gather the materials listed at the right, and follow the instructions below! To complete this project, you’ll also need our scientific method and data collection printable.
Watch The Video
https://youtu.be/XBBRp6TqlVk
Required Materials
- several bubble wands (for research)
- paper circles
- plastic milk rings
- bracelet
- pipe cleaners
- popsicle sticks
- foam
- tin foil
- bubble solution
- plate
- plastic bottle
- sock
Step-By-Step Instructions
Step 1
Spend some time gathering materials that can be used to make a stellar bubble-wand prototype! The list of materials at the right is simply a suggestion based on what Grace and Veronica used in the video. Be creative – there are no limits to what you can try!
Step 2
This project is designed to follow the scientific method, so start by posing a testable question: how do you make a great bubble wand? Be sure to fill it in on the scientific method printable!
Step 3
Make observations and do some research! Examine a selection of pre-made bubble wands and note the elements that are essential to their design as well as the ways they differ.
Step 4
With your research and observations in mind, hypothesize about what a bubble wand must have in order to make bubbles! Keep filling your answers in on the scientific method printable.
Step 5
List the materials you’re going to test as you build your bubble wand. Remember, be creative – the materials at the right are just a suggestion!
Step 6
Start building with your materials! Make sure you incorporate the elements of a successful bubble wand that you outlined in your hypothesis.
Step 7
Once you’ve built several bubble wand prototypes, enter each one into the data collection portion of the printable so you can make notes as you test them. Then experiment by testing them all using bubble solution!
Step 8
Compare your data. Which wands worked best? Were there any similarities between them (i.e., they used similar materials, had similar shapes, etc.)? Make your conclusions!
Step 9
Bonus – make the ultimate bubble blower! Cut the bottom off of a plastic bottle and cover it with an old sock. Make the sock as flat as possible where it covers the bottle. Dip the sock covered portion of the bottle into a plate filled with bubble solution or a mixture of water and a few drops of dish soap. Lift the blower slightly as you begin to blow out (not in!) to make an enormous bubble snake!