
Pre-Built Lesson: Rainbows
Who doesn’t love rainbows? In this Rainbow Science lesson plan for elementary schoolers, you’ll play with refraction and reflection, read about how to use your imagination to make your community a better place, and create your own hand-held rainbows in a kaleidoscopic swirl of color!
Resources in This Lesson
Resource 1
Explore how refraction and reflection help us to see different wavelengths of the visible light spectrum.
Rosie Explores Rainbow Science
https://handsonstem.rosieriveters.com/resources/rosie-explores-the-science-of-rainbows/
Resource 2
One persons’ trash is another persons’ treasure! Explore how you can create something to make your community a better place with this fun Be A Maker book.
Rosie Reads Be A Maker 
https://handsonstem.rosieriveters.com/resources/rosie-reads-be-a-maker-%ef%bf%bc/
Resource 3
Put all your knowledge of visible light, refraction and reflection from Rosie Explores to good use and build an awesome kaleidoscope!
Rosie Makes a Kaleidoscope
https://handsonstem.rosieriveters.com/resources/rosie-makes-a-kaleidoscope/
Resource 4
Continue learning and exploring with some of these tried and tested Rosie Recommends activities from other STEM educational resources.
Rosie Recommends Visible Light Activities!
https://handsonstem.rosieriveters.com/resources/rosie-recommends-visible-light-activities/
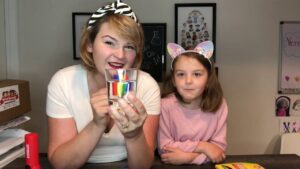
Rosie Explores Rainbow Science
Explore Rainbow Science with these fun experiments and examine the fascinating concepts of visible light, reflection and refraction as you make rainbows dance across your walls!
Electromagnetic Spectrum (Visible Light) Spectrum: The visible light spectrum is the segment of the electromagnetic spectrum that the human eye can view. More simply, this range of wavelengths is called visible light.
Reflection: Reflection is when incident light (incoming light) hits an object and bounces off. Very smooth surfaces such as mirrors reflect almost all light.
Refraction: Refraction is when light waves change direction as they pass from one medium to another. For example, light travels slower in air than in a vacuum, and even slower in water. As light travels into a different medium, the change in speed bends the light. Different wavelengths of light are slowed at different rates, which causes them to bend at different angles.
Want to duplicate it at home or in your classroom? Watch the video for an overview, gather the materials listed at the right, and follow the instructions below!
Watch The Video
https://youtu.be/I-L6MpGRXFA
Required Materials
- CD
- markers
- paper
- glass cup
- flashlight
Step-By-Step Instructions
Step 1
Fill a glass cup with water.
Step 2
Draw a rainbow (Red, Orange, Yellow, Green, Blue, Indigo, Violet) on a small sheet of paper.
Step 3
Observe the order of the colors in your rainbow. Then place your rainbow on the opposite of your glass of water and see if the order of the rainbow changes? This is refraction at work!
Step 4
Shine a light (flashlight or phone light) through the cup of water. Note what happens. The water in the glass is refracting or “bending” the light waves at different rates based on their frequency (how fast or how slow they move) to allow you to see all of the different colors in the light!
Step 5
Shine a light (flashlight or phone light) towards the shiny part of a CD. Note what happens. Move the light around, and watch for a rainbow on the wall!
Designing, creating, and making are at the core of what we do at Rosie Riveters, and we’re so excited to share Be a Maker by Katey Howes! The book begins with its heroine making projects by herself, but by the end she is engaged with her entire community in making something to be proud of.
While reading Be a Maker, ask kids these comprehension questions:
- What the heroine was making, and name three of her projects?
- Who she was working with to make these wonderful things?
For our Rosie Reads activity, identify something you could make in your community to make it a better place. What would the project be? How would it help your community? Who would you work with? What materials would you use, and how would you get it done?
Watch The Video
https://www.youtube.com/watch?v=QmelC_g0bG4

Rosie Recommends Visible Light Activities!
Check out these tried and tested visible light activities from other STEM educational resources!
Recommended Resources
Resource 1
This super fun experiment combines refraction with a lesson in color mixing, so it’s particularly good for our littlest friends (pre-K through 1st grade).
Resource 2
For older kids interested in visible light, build this spectroscope! While it sounds complicated, this simple instrument made from tape, a cardboard paper towel tube, and an old CD, splits light into different wavelengths along a spectrum. This one requires some angled cutting, ideally with an X-ACTO knife, so it’s best to do it with an adult present!
Resource 3
Explore the physics of light that create rainbows with this fun activity from Scientific American.

Get “reflective” on how to creatively use recycled materials and explore visible light with this fun kaleidoscope project!
If you need a quick review, be sure to check out our Rosie Explores episode on rainbow science.
Ready to make this project at home or in your classroom? Watch the video for an overview, gather the materials listed at the right, and follow the instructions below
Watch The Video
https://www.youtube.com/watch?v=RZ6-gP9_GtU
Required Materials
- card stock
- tin foil
- clear plastic (egg carton, packing material, etc.)
- scissors
- tape
- translucent colored beads
Step-By-Step Instructions
Step 1
Use the craft tube as a guide to trace a circle on the card stock. Draw a rectangle (3.5in x 3in) on the card stock.
Step 2
Trace two circles on the clear plastic. Use the craft tube as a guide.
Step 3
Cut out the card-stock and plastic templates. Be sure to cut a small circle out of the center of the card stock circle to look through.
Step 4
Fold the card-stock evenly into three 1 inch sections.
Step 5
Smoothly wrap the card-stock in tinfoil. Make sure the shiny side is facing out.
Step 6
Bring the two ends of the rectangle together to form a prism. Secure the seam with tape. 7) Place the tinfoil prism into the craft tube.
Step 7
Place the tinfoil prism into the craft tube.
Step 8
Place the card stock eyepiece (circle) on to one end of the craft tube. Secure with tape.
Step 9
Place one of the clear plastic circles into the craft tube on top of the prism.
Step 10
Fill the space between the clear plastic and the top of the craft tube with beads or the colored plastic you created.
Step 11
Place the last clear plastic circle to the top of the tube. Secure with tape.