
Grown Up Guides – A
 Grade
Grade The mantra we repeat in our programs is “I may not know, but I know I can figure it out.” Our projects are designed to foster the same “we can do it” attitude, and we encourage you to share this message with your children at home.
6th-8th Grade Projects
Resource 1
Spin Art
Centripetal force is defined as, “the force that is necessary to keep an object moving in a curved path and that is directed inward toward the center of rotation,” while centrifugal force is defined as “the apparent force that is felt by an object moving in a curved path that acts outwardly away from the center of rotation.
Our favorite example of centripetal force is a roller coaster! The feeling you experience during a roller coaster loop de loop is centripetal force! The track is exerting force outward on you and the car you’re in. This counters gravity which is trying to push you back down to Earth.
Have you ever been driving in a car when someone makes a quick turn and you feel like you’re being pushed out of the car? This feeling is actually known as a centrifugal force. This is not actually a real force, but a feeling. When you take that sharp turn, it feels like you’re being pushed out of the car, but really the car is pushing on you to change the direction you’re moving in to make a turn, which is our centripetal force!
In class we explored both of these concepts by working to pick up bouncy balls with spinning glasses and keeping water in a cup as we swung it in circles around the room.
In our spin art machines, the centripetal force acting on the system is supplied by the spinning motor. This force keeps the paint moving in a circular path while it is on. This is a “pull” force, similar to how satellites are kept in orbit due to the pull of Earth’s gravity. However when the motor is turned off that force is no longer pulling on the paint so it instead flies away in a straight line away from the circle’s center.
Check out our Rosie Explores activity below to learn more!
Rosie Explores Centripetal Force
https://handsonstem.rosieriveters.com/resources/rosie-explores-centripetal-force/
Resource 2
Zoetropes
Today we explored three concepts that work together to form the basis of the moving animations we see in our favorite cartoons and movies. Below are some definitions and a couple of questions to get your kids talking about the Zoetropes they created today.
- Persistence of vision– refers to the length of time the retina (the “screen” at the back of our eyes which is sensitive to light) retains an image. If we see a light flash every tenth of a second or less, we perceive it as continuous. The impression of each flash of light remains, or persists, in the retina for at least one-tenth of a second. Because of this persistence, we can’t tell where one flash ends and the next begins. Instead, we perceive a continuous light.
- Phi phenomenon– is a result of human instinct. Our brains strive to make meaning from what we perceive. When we see different images close together our brains quickly create a relationship between them. The phi phenomenon is the optical illusion of perceiving continuous motion between separate objects viewed rapidly in succession.
- Stroboscopic effect – is a visual phenomenon caused by the distortion of an image that occurs when continuous motion is represented by a series of short or instantaneous samples.
The slit in the persistence of vision scope, the slits in our zoetropes and the flipping between the pages of our flip books all work to create what is called the stroboscopic effect. This combined with persistence of vision and the phi phenomenon work together to make still images created by animators appear as fluid moving images.
Questions
- Why wouldn’t your zoetrope work if it didn’t have the black paper? The image wouldn’t be flashed or “strobed”. The scanning of the slits keeps the pictures from simply blurring together, and the user sees a rapid succession of images, producing the illusion of motion.
- What does your eye do when it sees an image? It retains a “picture” of the image for 1/10 of a second. Refer to the definition of Persistence of Vision above.
If your kids want to create another animation strip they will need a 17 inch long and 1.5 inch strip of paper. They should space each still image about 2 inches apart from each other.
Check out our Rosie Explores activity below to learn more!
Rosie Explores Persistence of Vision
https://handsonstem.rosieriveters.com/resources/rosie-explores-persistence-of-vision/
Resource 3
BioMechanical Hands
Today we explored biomechanics (the study of the mechanical laws relating to the movement or structure of living organisms). Focusing on our hands, we examined the mechanics that allow us to grip and move objects. More specifically, we explored how bones, tendons and muscles work together.
Using a stress ball we explored bone structure, identified where our joints bend, felt what muscles contract, and how our tendons help those three things work as one to squeeze the ball.
Using that knowledge we then built our own “robotic” hands that can pick up a tissue paper ball and “throw” it across the room.
Check out our Rosie Explores activity below to learn more!
Rosie Explores Biomechanics
https://handsonstem.rosieriveters.com/resources/rosie-explores-biomechanics/
Resource 4
Edible Water Bottles
Today we explored how the body forms clots by experimenting with spherification to create edible “water bottles”.
When the body is cut the body undergoes a process known as blood clotting to stop the bleeding. Blood clotting helps form a blood clot which works as a plug to fill any holes. How exactly is a blood clot made? When the skin tears, the body sends a message calling on special cells known as platelets. Platelets, which are already floating around in the blood, arrive at the wound and come together to create a barrier at the wound’s opening. This barrier slows the flow of blood, but platelets alone aren’t very strong. They need help from another special material known as fibrinogen proteins.
Fibrinogen proteins rush to the wound and, when they arrive, they change into fibrin fibers. Like string, the fibrin fibers help link and strengthen the platelets already plugging the wound. This process is known as coagulation and it’s a chemical change that helps turn liquid blood into a solid. In this case, the new solid is our blood clot!
In today’s experiment we combine two different chemical substances (sodium alginate and calcium lactate) to form our own version of a blood clot using water!
The link to the project video can be found here: https://www.rosieriveters.com/edible_water_bottles

Rosie Explores Centripetal Force
Centripetal force is the force that makes you go in a circle. Newton’s First Law tells us that objects in motion will continue to move at a constant velocity in a straight line unless acted on by a force. The centripetal force is directed toward the center of the circle, changing the object’s direction. Instead of going straight, the object moves in a circle.
Think about when you ride a roller coaster. At the top of a hill, you may lift out of your seat. This is because the car is changing direction, but your body continues in a straight line. When your seat belt pushes you down, it applies a centripetal force making your body move in a curve with the track.
Want to try this experiment at home or in your classroom? Watch the video for an overview, gather the materials listed at the right, and follow the instructions below!
Watch The Video
https://www.youtube.com/watch?v=hsshJ7eUe5U
Required Materials
- cup
- string
- washer or coin
- water
Step-By-Step Instructions
Step 1
Punch two holes near the top rim of the cup opposite each other and cut a length of string about twice the length of your arm.
Step 2
Thread the string through the holes in the cup and tie it in a loop.
Step 3
Place your coin or washer in the cup and swing it in a vertical circle like in the video. The coin should not fall out of the cup. It make take a couple tries to accomplish this.
Step 4
Now put a little water in the cup and try swinging it again. The water should not spill.
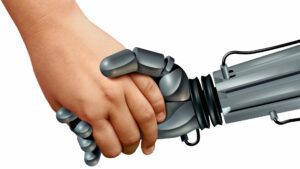
Biomechanics is the study of how our bodies – and all living organisms – work. It’s the foundation of humanoid robotics; to build a machine that mimics a human body, we have to know exactly how it works!
This biomechanics activity explores the ways our bones, muscles, and tendons enable our hands to move and bend in preparation to build a biomechanical hand!
There are four main parts of your hands:
- Bones provide structure
- Joints make bones flexible
- Muscles allow the bones to move
- Tendons connect the bones to the muscles
We’re talking mainly about bones, muscles, and tendons, in this video, but joints are pretty easy to identify too – they’re where two bones meet!
There’s a simple way to identify your tendons. Hold up your hand so that your palm is facing away from you. Bend your fingers backwards slightly, and you will see what look like strings on the back of your hands. These are your tendons! Tendons are attached to your muscles and run all the way down your arm. When you use them to move your fingers and squeeze them into a fist, you can see the tendons move the muscle on your arm as well.
Watch The Video
https://youtu.be/-hg1ZeUaNDM
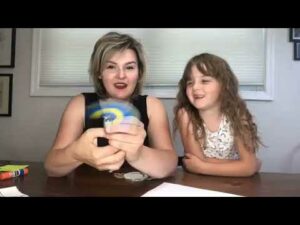
Rosie Explores Persistence of Vision
This experiment explores the persistence of vision. Fun fact your eye doesn’t process things as fast as you think!
Want to duplicate this experiment at home or in your classroom? Watch the video for an overview, gather the materials listed at the right, and follow the instructions below!
Watch The Video
https://youtu.be/qMnEUwlHeyI
Step-By-Step Instructions
Step 1
Cut out two circles from your piece of paper.
Step 2
Tape two rubber bands to the one side of one of the circles. Tape or glue the other circle on top of the rubber bands.
Step 3
Draw a face on one side of the circles.
Step 4
Flip the circles over, spin them upside down, and draw something towards the top of the circles for the face to wear on its head.
Step 5
Hold both rubber bands, one in each hand, and flip the circle over and over to wind it up.
Step 6
Release the circle, letting it spin quickly, and watch what happens!