
Grown Up Guides – B
 Grade
Grade - WARNING: The Homopolar Battery Ballerinas project is only for older children as neodymium magnets are extremely strong and MUST BE KEPT OUT OF REACH OF SMALL CHILDREN. Do not give them to any child who might put them in their mouth, they are dangerous if swallowed.
The mantra we repeat in our programs is “I may not know, but I know I can figure it out.” Our projects are designed to foster the same “we can do it” attitude, and we encourage you to share this message with your children at home.
6th-8th Grade Projects
Resource 1
Kinetic Butterflies
Today we learned about physics by diving into Kinetic Energy, or the energy of motion. A few things you can ask your child:
–What is the difference between Kinetic Energy and Potential Energy? Objects have kinetic energy if they are moving. Objects that are not moving but could move if released have potential energy.
-Where does your butterfly store potential energy? When the rubber band is wound the potential energy is stored in the rubber band. The more it is wound the more energy it stores.
Check out our Rosie Explores activity below to learn more!
Rosie Explores Potential and Kinetic Energy
https://handsonstem.rosieriveters.com/resources/rosie-explores-potential-vs-kinetic-energy/
Resource 2
Homopolar Battery Ballerinas
When electricity and magnetism are combined, we can create motion. An electric current flowing through a wire that happens to be in a magnetic field feels a force push on it. In this system electricity flows through a wire from the positive side of a battery to the negative side and into the magnet. It then flows across the magnet and back into the wire causing a spinning motion. In our Homopolar Battery Ballerinas we used magnets and electricity to create a specific motor known as a homopolar motor. It is called this because the polarity made by the wire and magnetic field does not change (“homo” meaning “same”).
Resource 3
Hydraulic Desk Lamp
Hydraulics is a branch of science that studies the usefulness of fluids in motion. To create the moveable arm of our hydraulic desk lamps we harnessed the power of liquid’s special in-between state. While liquids can be easily heated or cooled, they do not compress easily, meaning you cannot squeeze them like you could a solid or a gas.
In a liquid, pressure (force per unit area) is transmitted equally in all directions. If you have liquid in a tube, and you push down on it at one end, the liquid will move, pushing out through the other end without losing any pressure. This idea is also known as Pascal’s Principle which states that a pressure change in one part of a fluid is transmitted without loss to any part of the fluid and the walls of its container. If the container is smaller at one end, you can increase the pressure as the liquid is forced to squeeze through a smaller space. This allows moderate pressure at one end to create stronger pressure at another end.
We used this principle to create the hydraulic valve that lifts our desk lamp’s arm. The pressure applied to the small syringe creates a stronger pressure on the large syringe to lift the arm of our lamp!
Resource 4
App Lab
Today we learned about computer science on Code.org, a fun, creative platform for learning computer science and basic coding to create interactive animations, games, or apps.
How to get your child set up to use Code.org at home:
Our class uses personal logins to sign in. To have your student sign in to Code.org at home, do the following:
- Go to https://studio.code.org/ and click ‘Sign In’
- Have them enter their email and password and then click ‘Sign In’
- If your student does not remember their password, they can reset it from the sign in screen
At the top of their homepage, your student can continue the course they were working on today. They can also create their own games or artwork in the Project Gallery or check out code.org/athome for ideas for things to work on at home.
How to connect your email to your student’s account
Keep up to date with what your student is working on and receive updates from Code.org. Have your child sign in to Code.org and then enter your email in Account Settings.
Why computer science
Six different studies show: children who study computer science perform better in other subjects, excel at problem solving, and are 17% more likely to attend college. Computer science teaches students critical thinking, problem solving, and digital citizenship, and benefits all students, no matter what opportunities they pursue in the future. And learning to make interactive animations, code-art, games, and apps on Code.org encourages creativity and makes learning fun.
Code.org’s commitment to student privacy
Code.org assigns utmost importance to student safety and security. Code.org has signed the Student Privacy Pledge and their
privacy practices have received one of the highest overall scores from Common Sense Media. You can find further details by
viewing Code.org’s Privacy Policy.
Check out our Rosie Explores activity below to learn more!
Rosie Explores Coding
https://handsonstem.rosieriveters.com/resources/rosie-explores-coding/
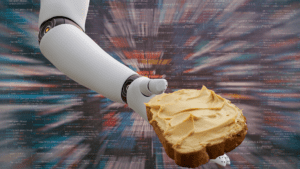
- If peanut allergies are a concern, particularly in classroom settings, substitute sunflower butter.
This messy but always fun Rosie Explores activity introduces kids to algorithms, functions, loops, bugs and the need for specificity in coding as they attempt to “code” a robot!
It’s best to do this with at least three people – a programmer, a robot, and a scribe to record the algorithm (the steps needed to complete the peanut butter and jelly sandwich). That way you can look back at each line of code and see where there may be “bugs” or errors in your instructions. You can also discover how you might create functions and loops to repeat steps that need to happen over and over again! This activity works great in larger classrooms too as you can designate groups of students to be scribes and programmers.
As this is an introductory coding activity, it includes some computing terms that might be new to kids:
Algorithm – a process or set of rules to be followed in calculations or other problem-solving operations, especially by a computer.
Function – a block of organized, reusable code that is used to perform a single, related action.
Loop – a control flow statement for specifying iteration, which allows code to be executed repeatedly.
Bug – an error, flaw or fault in a computer program or system that causes it to produce an incorrect or unexpected result, or to behave in unintended ways.
Ready to become a robot and make a PB&J? Watch the video for an overview, gather the materials listed at the right, and follow the instructions below!
Watch The Video
https://youtu.be/v5ZU6wuD1PE
Required Materials
- peanut butter
- jelly
- loaf of bread
- knife
- plate
- paper
- pen, pencil, or other writing tools
Step-By-Step Instructions
Step 1
Designate who will be the robot, programmer(s), and scribe(s).
Step 2
Don’t prepare for the activity! Leave the bread in the package, and the lids on the containers of the peanut butter and jelly. Place these items along with a plate and knife in front of the robot.
Step 3
Have the robot transform! Make sure the programmer and scribe know that the robot has no prior knowledge related to sandwich making. It recognizes the materials, but will only do exactly what the programmers tell it to do!
Step 4
Ask the programmer for the first step. Make sure that the robot follows these instructions literally, and watch as hilarity ensues! The scribe should be writing the steps as well, recording exactly what the programmer says.
Step 5
Continue giving the robot instructions and writing the steps until it has produced some semblance of a sandwich. Then have the robot transform back into a human, and discuss why it was so hard to get the sandwich made.
Step 6
Finalize the best version of the sandwich-making code with the scribe, and figure out which steps could be repeated using functions and loops.

Energy is the potential for something to do work, and we’re exploring the differences between potential and kinetic energy!
Potential energy is the energy stored in an object due to its position while kinetic energy is the energy an object possesses due to motion. We’re doing two experiments – one with a rubber band, the other with a balloon – to investigate!
Want to duplicate them at home or in your classroom? Watch the video for an overview, gather the materials listed at the right, and follow the instructions below!
Watch The Video
https://youtu.be/UOzDlPXzQWw
Required Materials
- balloon
- ruler
- rubber band
Step-By-Step Instructions
Step 1
To explore potential energy, hold a ruler so that the side marked with inches is facing away from you. Stretch a rubber band over the corner of the ruler to the one-inch mark. Make sure there is no one around you that you could accidentally hit with the rubber band, then release the rubber band. Next, measure how far the rubber band traveled.
Repeat steps one through four, this time stretching the rubber band back to the four-inch mark. Remember to make sure no one is around you! Note how much farther this rubber band went compared to the first time as it had more potential energy given its position further back along the ruler!
Step 2
To explore kinetic energy, blow up a balloon. Don’t tie it! Instead, let it go so it can fly! When filled with air, the balloon has potential energy – the stretched rubber of the balloon itself and the air inside it. When the air is released, the potential energy is converted to kinetic energy as the balloon deflates and zooms around the room!