Grown Up Guides – C
 Grade
Grade The mantra we repeat in our programs is “I may not know, but I know I can figure it out.” Our projects are designed to foster the same “we can do it” attitude, and we encourage you to share this message with your children at home.
K-2nd Grade Projects
Resource 1
Density Bracelets
Today your child learned about mass and density through the creation of tubular science bracelets where glitter and perler beads serve as literal illustrations of these principles. We encourage you to further explore the principles discussed in today’s project with your child in an effort to reinforce their understanding of the subject matter and inspire their continued curiosity of STEM.
Below are some questions that you might like to explore with your child:
Q: How do I tell if something has more molecules than something else? What is that called?
A: Weight (or mass) and density are proportional when objects are the same size because the more molecules, the heavier an object will be. So we can identify if something is denser (measure density) than something else by its weight (or mass).
Q: Why don’t the perler beads in your bracelet float freely like the glitter does?
A: The beads have a higher density than water, so they sink and won’t move freely around the tube. The density of the glitter is less than that of water, so it floats around the tube.
Check out our Rosie Explores activity below to learn more!
Rosie Explores Density
https://handsonstem.rosieriveters.com/resources/rosie-explores-density/
Resource 2
LED Art
Definitions:
- Electrons: A stable subatomic particle with a negative charge, found in all atoms and acting as the primary carrier of electricity in solids. We had a great time “repelling” (passing an extra ball around) them in our circuit.
- Batteries: When a battery is supplying electric power, its positive end (cathode) and its negative end (anode). The end marked negative (-) is the source of electrons that, when connected to an external circuit, will flow and deliver energy to an external device like an electric motor. We worked to make sure that the positive and negative ends of our batteries were positioned properly in our circuits.
- Circuit: A circuit is a path that starts and stops at the same place. We talked a lot about circles today and how circuits have to be completely “closed” to work.
With this information in mind some, below are a few questions to ask your kids:
- What is electricity? Electricity is the flow of charge. Usually charges will be carried by free-flowing electrons. Elements with high conductivity, which have very mobile electrons, are called conductors. These are the types of materials we want to use to make wires and other components which aid in electron flow. Metals like copper, silver, and gold are usually our top choices for good conductors.
- What three things are required to create an electric circuit that makes their LED turn on? An energy source (battery), a path (wire), and a motor.
- What would happen if one of the wires were to come loose from the circuit? The circuit would be open and the flow of electrons would stop moving through the circuit, meaning the light would not turn on.
Check out our Rosie Explores activity below to learn more!
Private: Rosie Explores Electricity
https://handsonstem.rosieriveters.com/?post_type=rr_resource&p=1090
Resource 3
Balloon Powered Cars
In this project, we converted potential energy (air inside the balloon) into kinetic energy (motion of the car) as they released the air and watched their cars roll forward. This hands-on experience helped them understand the basic principles of energy conversion in a fun and engaging way.
To continue this exploration of energy at home, I would encourage you to ask your child the following questions:
- How does the air inside the balloon help power the car?
- Can you explain potential and kinetic energy in your own words?
- What other ways can potential energy be converted into kinetic energy? (e.g. a roller coaster, a bouncing ball, etc.)
Check out our Rosie Explores activity below to learn more!
Rosie Explores Potential and Kinetic Energy
https://handsonstem.rosieriveters.com/resources/rosie-explores-potential-vs-kinetic-energy/
Resource 4
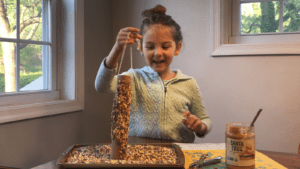
Bird Feeders
In this project, we created a bird feeder to change the habitat of birds and make it more inviting.
To continue this exploration of habitats at home, we would encourage you to ask your child the following questions:
- Can you identify an animal habitat around you? What animal lives there and how has the animal adapted to meet its needs?
- What are the four things a habitat needs? (food, water, shelter from weather and predators, and a place to raise their young).
Check out our Rosie Explores activity below to learn more!
Rosie Explores Habitats
https://handsonstem.rosieriveters.com/resources/habitats/

Join Rosie Girl Veronica as she talks about different types of habitats and how humans and animals adapt them to meet their needs!
A successful animal habitat provides four things: food, water, shelter, and protection. And there are five different types of habitats on earth (based on biomes):
- Aquatic
- Grassland
- Tundra
- Desert
- Forest
Want to evaluate habitats at home or in your classroom? Watch the video for an overview and follow the instructions below!
Watch The Video
https://youtu.be/FwfcOhN1ACg
Step-By-Step Instructions
Step 1
Get outside! Identify an animal habitat around you. Remember the four elements that a successful habitat provides: food, water, shelter, and protection.
Step 2
Identify what type of habitat you found. What animal lives there? How has it adapted the habitat to meet its needs? Conversely, how might the animal itself adapt to live successfully in the habitat?
Step 3
What type of habitat is it: aquatic, grassland, tundra, desert, or forest? To read more about these types of habitats, visit ThoughtCo!
Step 4
Think about what habitat you live in! How does your habitat compare to others? How have you adapted your habitat to meet your need for food, protection, water, etc.?

This fun experiment explores density by discussing molecules, and determining whether objects sink or float.

Before you build your density dunk tank, take a few minutes to review matter and molecules (this is in the video too!). Using tape, make two equal sizes boxes on the floor. Choose an object you have quite a few of in the same shape and size (bouncy balls, dolls, etc.). These will represent molecules. Demonstrate that when you compare two objects of the same shape and size (the taped boxes), the one that has more molecules also has a higher density!
Want to duplicate the density dunk tank at home or in your classroom? Watch the video for an overview, gather the materials listed at the right, and follow the instructions below!
Watch The Video
https://youtu.be/7GPHzoGx5jQ
Required Materials
- large bowl or container
- water
- 2 sheets paper
- pen, pencil, or other writing tools
- small, similarly sized objects to test
Step-By-Step Instructions
Step 1
Fill a bowl 3/4 of the way to the top with water.
Step 2
Use your paper and writing utensil to make two signs – one with the word “sink” the other with “float“.
Step 3
Review that an object will sink if it has more molecules in its space than the water does. An object that sinks has a higher density than water. Conversely, an object will float if it has less molecules in its space than the water does; an object that floats has a lower density than water.
Step 4
Go through your items and make hypotheses about whether they will sink or float. Place them on the relevant signs according to your hypotheses.
Step 5
Once you’ve made an hypothesis about each of your items, drop each one into the bowl to test it. Was your hypothesis correct? Repeat the process with each object and do some comparisons once you’re done. Which objects surprised you?

Energy is the potential for something to do work, and we’re exploring the differences between potential and kinetic energy!
Potential energy is the energy stored in an object due to its position while kinetic energy is the energy an object possesses due to motion. We’re doing two experiments – one with a rubber band, the other with a balloon – to investigate!
Want to duplicate them at home or in your classroom? Watch the video for an overview, gather the materials listed at the right, and follow the instructions below!
Watch The Video
https://youtu.be/UOzDlPXzQWw
Required Materials
- balloon
- ruler
- rubber band
Step-By-Step Instructions
Step 1
To explore potential energy, hold a ruler so that the side marked with inches is facing away from you. Stretch a rubber band over the corner of the ruler to the one-inch mark. Make sure there is no one around you that you could accidentally hit with the rubber band, then release the rubber band. Next, measure how far the rubber band traveled.
Repeat steps one through four, this time stretching the rubber band back to the four-inch mark. Remember to make sure no one is around you! Note how much farther this rubber band went compared to the first time as it had more potential energy given its position further back along the ruler!
Step 2
To explore kinetic energy, blow up a balloon. Don’t tie it! Instead, let it go so it can fly! When filled with air, the balloon has potential energy – the stretched rubber of the balloon itself and the air inside it. When the air is released, the potential energy is converted to kinetic energy as the balloon deflates and zooms around the room!