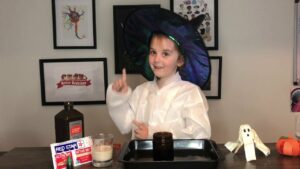
Rosie Makes STEMtastic Halloween Decorations!
We made three – yes three! – awesome STEM-inspired Halloween decorations in this video. Click each resource below for bouncing pumpkins, papier-mache ghosts, or witch’s brew – oh my! All of these projects combine STEM and Halloween while exploring physical and chemical changes.
Watch The Video
https://youtu.be/NKpLpNP35TI
Rosie Makes Halloween Decorations!
Resource 1
Rosie Makes Bouncing Pumpkins
https://handsonstem.rosieriveters.com/resources/rosie-makes-bouncing-pumpkins/
Resource 2
Rosie Makes Papier-Mache Ghouls
https://handsonstem.rosieriveters.com/resources/rosie-makes-papier-mache-ghouls/
Resource 3
Rosie Makes Witch’s Brew
https://handsonstem.rosieriveters.com/resources/rosie-makes-witchs-brew/
Rosie Makes Witch’s Brew
- Protective eyewear is required for this project. DO NOT EAT any of the ingredients that are used or created. The product of the reaction may look like toothpaste but it is not safe to consume.
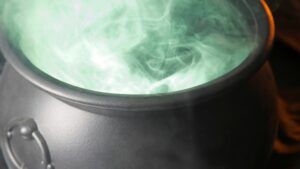
We made three – yes three! – awesome STEM-inspired Halloween decorations in this video! To make witch’s brew, also known as elephant toothpaste, view the video from 4:29-5:49.
A chemical reaction occurs when two different things are mixed together to make something completely new! In this project we are using hydrogen peroxide and active yeast to create elephant toothpaste with a witchy twist!
So how does it work? When hydrogen peroxide breaks down, it turns into oxygen (O2) and water (H2O). Normally this breakdown happens very slowly. But if you mix yeast with hydrogen peroxide, you create a chemical reaction where the hydrogen peroxide rapidly breaks down into water and oxygen gas. Adding dish soap to this chemical reaction makes it even more exciting. The bubbles formed by the oxygen gas, which would usually pop quickly, will get trapped and create lots of foam as the soap provides additional surface tension. This foam looks like a giant squeeze of toothpaste—almost big enough for an elephant(see Scientific American for more info)!
Ready to make this project at home or in your classroom? Watch the video for an overview, gather the materials listed at the right, and follow the instructions below!
Watch The Video
https://youtu.be/NKpLpNP35TI
Required Materials
- protective eyewear
- Warm water
- 1 packet active yeast
- 2 cups
- cookie sheet or tray
- 1/2 cup 3% hydrogen peroxide
- 3-4 squirts dish soap
- 2 drops food coloring
Step-By-Step Instructions
Step 1
Put on protective eyewear before starting this project.
Step 2
Use a cup to mix warm water with a packet of active yeast per the instructions on the packet. Set aside.
Step 3
Place a cup into the center of a cookie sheet or craft tray. Carefully add 1/2 cup of 3% hydrogen peroxide, three to four small squirts of dish soap; and two drops of food coloring to the cup.
Step 4
Pour the activated yeast into the hydrogen peroxide, soap, and food coloring mixture and watch your witch’s brew begin to bubble, bubble and bubble!
Rosie Makes Papier-Mache Ghouls
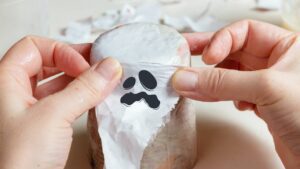
We made three – yes three! – awesome STEM-inspired Halloween decorations in this video! To make papier-mâché ghouls, where we transform paper into Halloween ghosts, view the video from 1:43-4:28.
Papier-mâché is French for “chewed-up paper” due to its appearance. It’s a construction material that consists of pieces of paper, sometimes reinforced with textiles, stuck together using a wet paste (e.g., glue, starch, or wallpaper adhesive). The crafted object becomes solid when the paste dries. Meaning that papier-mâché is an example to chemical change!
How does it work? Paper is composed of cellulose fibers, which are long chains of starches linked together. Flour is a starch too, just one long single polymer, or chain. When a solution of starches is added to the surface of cellulose fibers, they will ‘link’ the chains together, acting like natural glue.
Ready to make this project at home or in your classroom? Watch the video for an overview, gather the materials listed at the right, and follow the instructions below!
Watch The Video
https://youtu.be/NKpLpNP35TI
Required Materials
- paper
- scissors
- ruler
- 1 balloon
- cup
- bowl
- 1/2 cup flour
- 1/2 cup water
- permanent marker
- paint (optional)
Step-By-Step Instructions
Step 1
Cut six to eight strips of copy paper (standard letter size). The strips should be one inch wide (use the longer side of the paper as the length). Use two sheets to make 12 to 16 strips total, and set aside.
Step 2
Inflate a balloon just large enough to sit on top of the lip of your chosen cup. Tie off the balloon. This will create the form to shape your ghoul around.
Step 3
In a bowl, mix 1/2 cup of plain flour with 1/2 cup of water. Stir until a gluey-like paste is formed. Add additional water and/or flour as needed until the paste is spreadable. This is your paper-mâché paste!
Step 4
Coat each strip of paper with your paper-mâché paste. Be sure to squeeze off any excess paste by running the strip through your fingers. Apply the strips in a crissscross pattern over your balloon. Make sure that the ends of the strips hang past your balloon.
Step 5
Allow your creation to dry completely (usually 1-2 hours).
Step 6
Decorate your creation with a permanent marker or paint until you achieve your desired effect!
Rosie Makes Bouncing Pumpkins
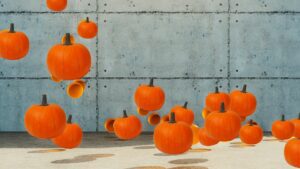
We made three – yes three! – awesome STEM-inspired Halloween decorations in this video! To make bouncing pumpkins, where we transform an ordinary piece of construction paper into a bouncing Halloween toy, view the video from 0:14-1:42.
This super fun activity explores physical change, i.e. a change where no new substance is formed. Physical changes affect the form of a substance, but not what it’s made up of. Some physical changes are reversible and mass does not change. An example is a change in shape!
Ready to make this project at home or in your classroom? Watch the video for an overview, gather the materials listed at the right, and follow the instructions below!
Watch The Video
https://youtu.be/NKpLpNP35TI
Required Materials
- construction paper
- ruler
- scissors
- glue
- marker (optional)
Step-By-Step Instructions
Step 1
Measure and cut a standard piece of construction paper into four strips measuring one inch in width or six strips measuring 1/2 inches wide. You can measure the width horizontally or vertically – it’s up to you!
Step 2
Glue two strips of the construction paper into an “X” shape. Do this twice. You will have two “X”s.
Step 3
Glue the two “X” shapes together, one on top of the other, to create a shape resembling a star.
Step 4
Glue the top of the opposite ends of each strip together to create a sphere-like shape.
Step 5
Decorate as desired with additional construction paper (you can add a stem!) or makers. Wait for all of the glue to completely dry.
Step 6
Once dry, apply pressure to the center of the sphere and release. Your pumpkin should bounce up from the table!