In this Rosie Labs guide you will find:
- Productive struggle opportunities for students during their project build,
- Lesson objectives and concept overview,
- Optional STEM topic video to share with participants,
- Step-by-step instructions and video of the Rosie Riveters’ Chromatography Butterflies Project,
- Optional STEM activities to further explore the objectives and concepts used in the project build.
Objective
Participants will learn the basic principles of chromatography and practice their color theory by forming a hypothesis of what colors make up their markers!
Concept Overview and Experiment Inspiration
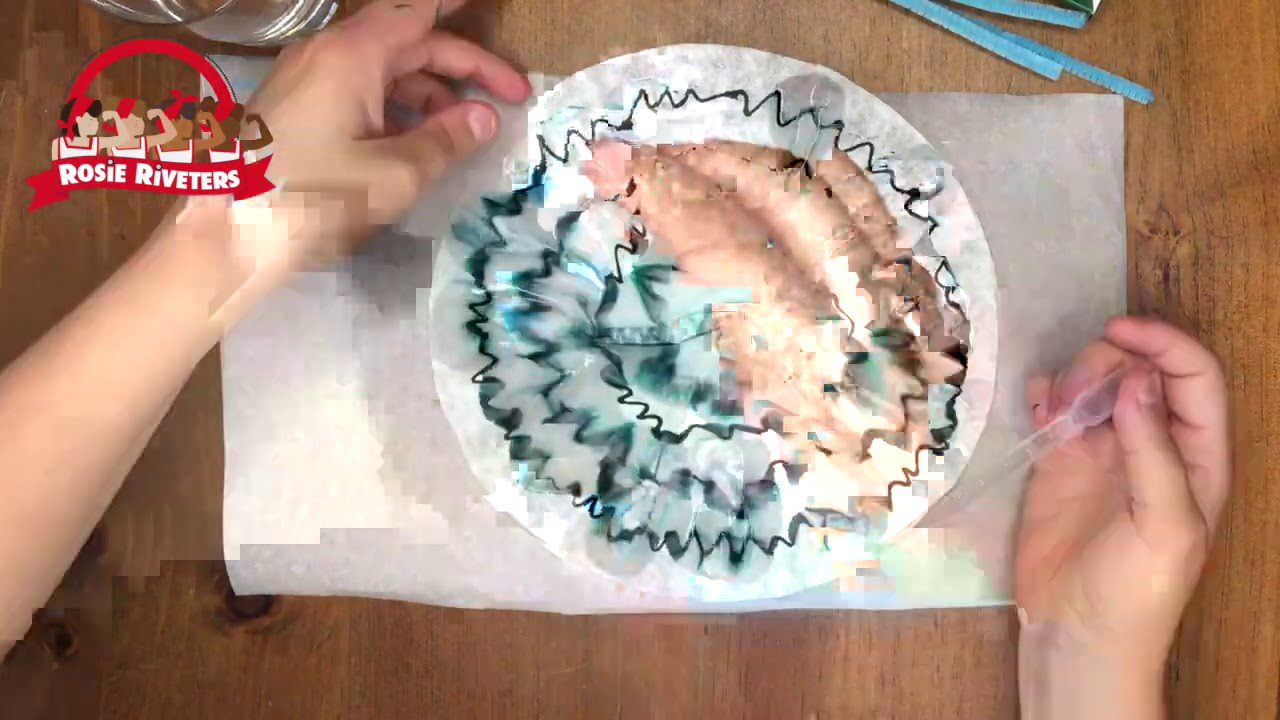
Chromatography is a technique used to separate and analyze different compounds in a mixture. This is done by allowing the mixture to pass through a medium, like paper or a gel, that separates the components based on their physical properties, such as size and charge.
Electrophoresis is a similar technique, but it uses an electric field to separate the components in a mixture. This is often used to separate proteins and nucleic acids based on their size and charge.
Chromatography and electrophoresis are two techniques used in biochemistry to separate and analyze different components of a mixture. These techniques can also be demonstrated in an ink chromatography lab using markers and coffee filters. By using coffee filters and water, students can observe the different colors in the ink of the marker separating as they move up the filter due to the principles of chromatography. Electrophoresis, on the other hand, separates molecules based on their electrical charge, and can also be demonstrated in a similar lab by separating different components of a mixture. By participating in this hands-on activity, students can gain a better understanding of these scientific techniques and see how they are used in real-world applications in the field of biochemistry.
Science Goals
- Physical Sciences: Structure and Properties of Matter
- Recognize that some properties of materials can be explained by the molecular structure
- Explore and explain the movement of particles in a mixture
- Understand the process of separation of mixtures into their individual components
- Science Process Skills:
- Hands-on, inquiry-based learning
- Designing and carrying out experiments
- Making observations
- Drawing conclusions based on findings
- Developing critical thinking and problem-solving skills
Vocabulary
- Chromatography: A technique used in biochemistry to separate and analyze the different components of a mixture that works by separating molecules based on their physical properties, such as size and solubility.
- Electrophoresis: A technique used in biochemistry to separate and analyze different components of a mixture by separating molecules based on their electrical charge
- Mixture: A combination of two or more substances in which each substance retains its chemical properties
- Separation of Mixtures: The process of dividing a mixture into its individual components based on specific properties, such as size, solubility, and electrical charge